The Decoy Shed
Artist Bob White's step-by-step illustration process for DU magazine
Artist Bob White's step-by-step illustration process for DU magazine
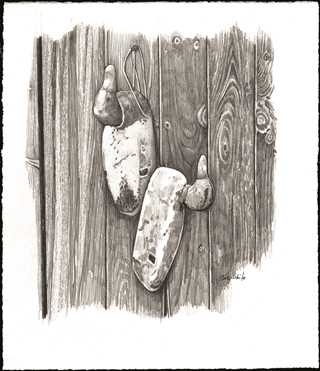
I always look forward to receiving Doug Larsen's "Last Call" column for Ducks Unlimited magazine. Since I have the privilege of creating the image, which accompanies it, I get a sneak peak before all the other members!
Doug and I have known each other for nearly 35 years, and have spent a good bit of that time together hunting ducks. Like most good hunting partners we've learned to anticipate each other's moves, so given the time of year, I wasn't at all surprised to find that his next column was about decoys.
I often enjoy the preparation that's involved with creating a work of art as much as the actual execution of it. So, after reading the column, I was excited to assemble the necessary props to work with.
My studio is a bit of a hunting and fishing museum, so the decision was which decoys do I draw? I decided upon a pair of handmade mallards given to me by my father-in-law, Dave.
The background was easy enough. I chose to hang the blocks on the highly textured doors of my own decoy shed, which I've dubbed, "The Quack Shack".
Several photos were taken before I arrived at a composition I was happy with.
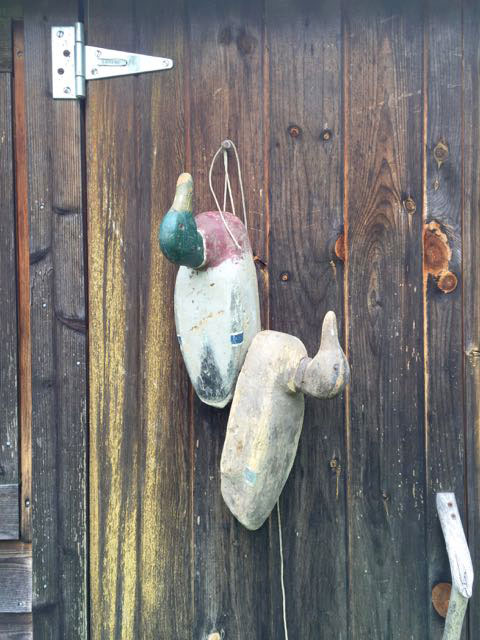
The challenge to rendering the highly textured barn wood would be achieving broad stokes of graphite with minute pencil points. Fortunately, I've learned a technique to meet the challenge. On my drawing board, in a basket with all my other paraphernalia is a small board with disposable layers of sand paper. This is used to shape the pencil lead into whatever shape is needed to create the desired mark.
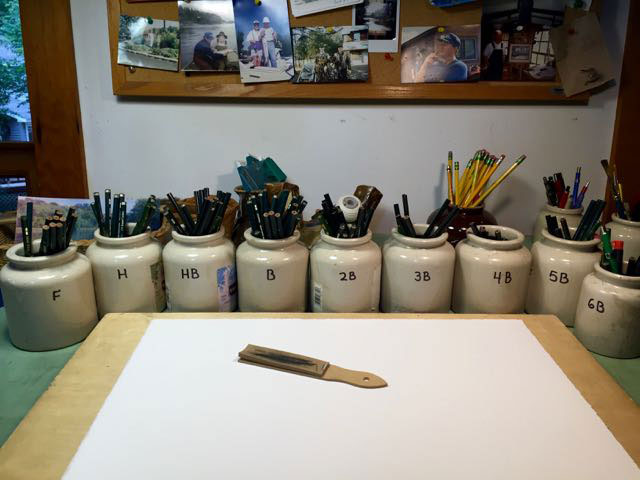
My first step was to select a variety of pencils. Most folks have only used a No. 2 lead pencil. Artists employ a wide variety of pencils, each with a different softness. The softer the lead the darker the mark it leaves. These pencils are numbered from "F," being very hard (light marks) to "B," which is softer and leaves a darker mark. The pencils I use range (in order of hardness) from F through 6B, in this order. F H HB B 2B 3B 4B 5B 6B.
Here's a photograph of my drawing board with my pencils arranged from hard (light) to soft (dark). My shaping board is also ready.
I chose a variety of pencils and sanded their points into various shapes; most of them are broad and chisel-like. These would allow me to make broad, sweeping marks that better simulate the wood grain I'm trying to draw.
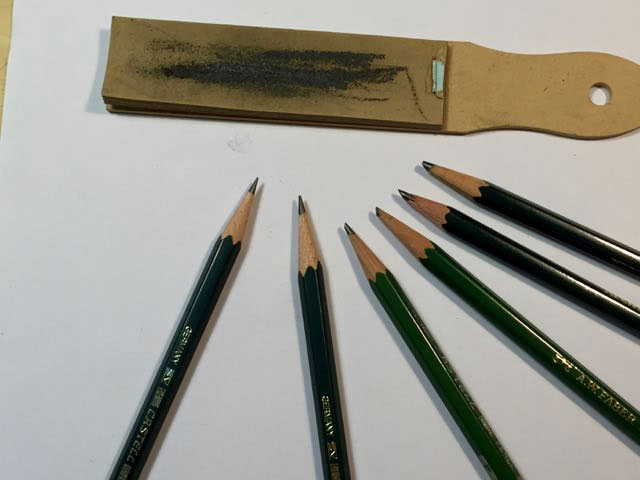
After the points are shaped, they're 'softened' or polished, on a piece of scrap paper. Otherwise, the sharp edges might cut my drawing paper!
Drawing with a chisel-point is more like making a brush stroke than writing. It takes some getting used to, but it's a very effective way of covering broad swaths of paper while achieving an interesting variety of marks.
Here's a close look those chisel points.
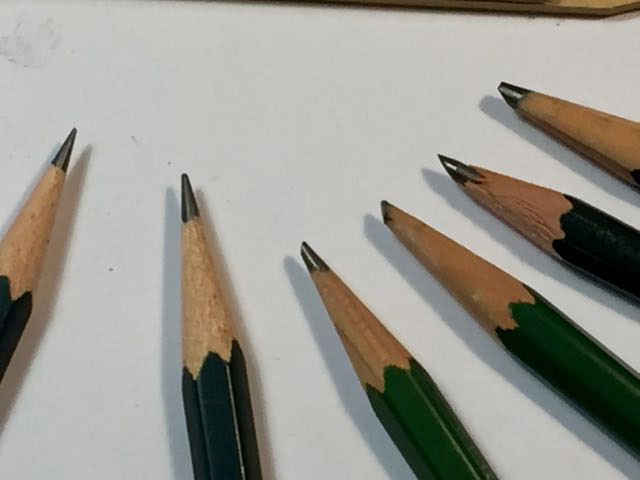
In many ways, drawing with such points is more like 'carving' an image than drawing one!
Imagine, trying to render the texture of this wood grain with a small, pointed. It's certainly possible, but it would take ten times the effort and wouldn't look nearly as interesting.
The next step in the drawing is to render the decoys, and even more importantly the shadows they cast onto the door. Without the shadows, the decoys wouldn't feel grounded and seem to float. The drawing would look like a bad 'cut-and-paste' job.
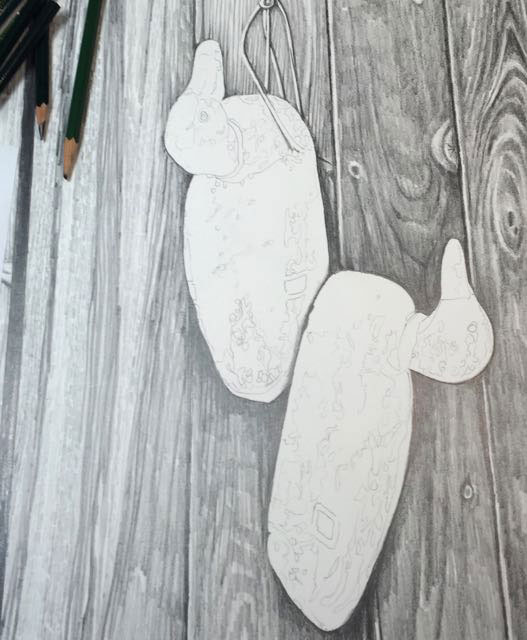
Finishing the drawing entails rendering the decoys in a strong and confident manner. Again, the chisel points come through. Drawing the decoys in such a manner is almost more like carving them!
Thanks for joining me!
Ducks Unlimited uses cookies to enhance your browsing experience, optimize site functionality, analyze traffic, and deliver personalized advertising through third parties. By continuing to use this site, you agree to our use of cookies. View Privacy Policy